
Last update 5/2/2024
Your Steel-string guitars need to have their strings replaced periodically. This guide will give you all the information you need to replace your acoustic guitar strings in 6 easy steps. A new set of strings will make your guitar sound like new again.
Table of contents
Changing acoustic guitar strings
If you don’t have a commercial neck support, no problem; roll up some old towels or use a suitable cushion to ensure the guitar is stable.
2. Remove the old strings

Now, release the tension from all strings. Note: It is perfectly acceptable to remove and replace all the strings together instead of one by one. Most reputable guitar builders, including Martin and Taylor, recommend this method.
Next, remove your old guitar strings by loosening all the tension from all six strings by turning the tuners clockwise and keeping a little pressure under the string with your finger.
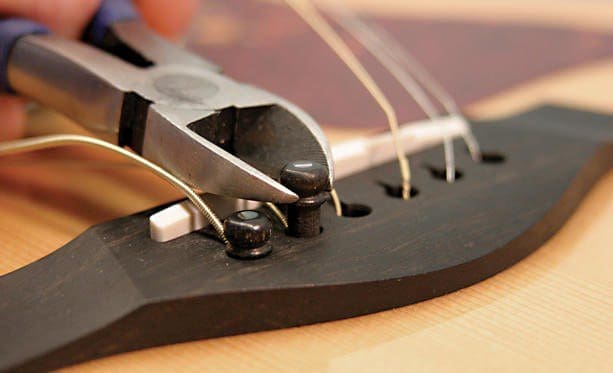
After loosening all the strings, remove the six bridge pins and put them to one side. Preferably where they can’t go missing now; if any of the pins are difficult to remove with your fingers, take your wire cutters and use a pivoting (cantilever) action on the saddle; gently apply a small amount of upward pressure on the pins.
They usually pop up quickly, allowing you to take them out with your fingers. Pull out all the strings and tie them together into a loop. That will stop the strings from going in every direction and minimize the chance of scratching the guitar.
Next, pull the other end of the strings out of the pegs and put them to one side. Then. Dispose of the old strings. See photo.
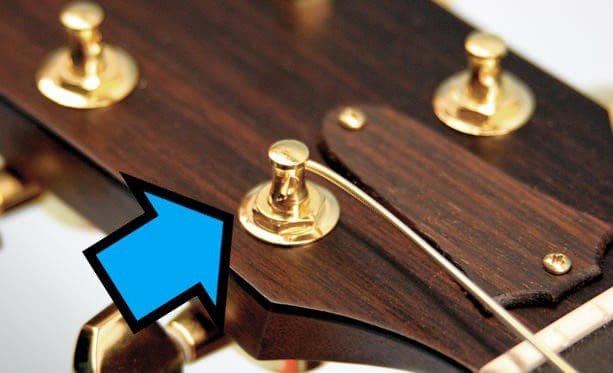
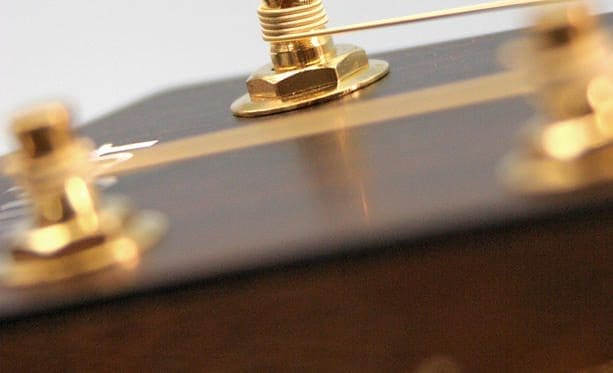
Turn all six tuners so the hole is at a 45-degree angle. See photo.
3. Clean the fretboard

Now is the time to clean your fretboard with a bit of Naphtha (lighter fluid) and a clean paper towel. There are lots of commercial products available to clean and condition the fretboard.
Note: Before fitting the new strings to your guitar, this is an ideal time to consider some additional steps, such as performing thorough cleaning and maintenance if required.
4. Fit the new strings
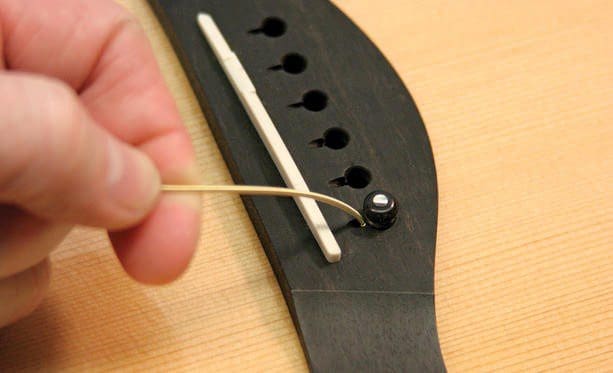
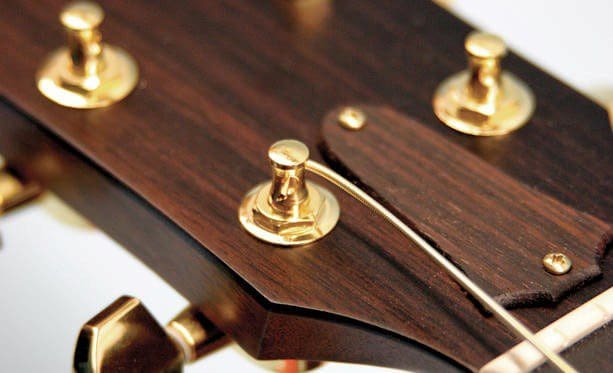
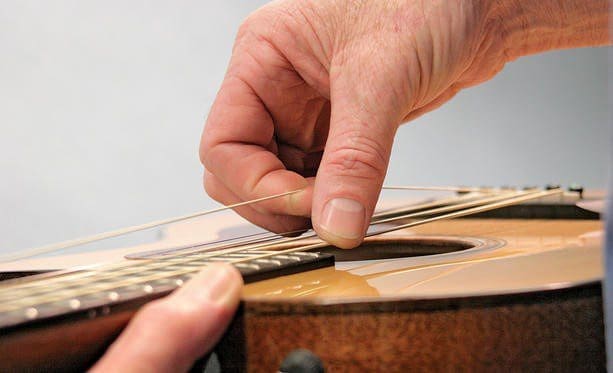
Refer to the photo above. Now, insert the ball end of the 6th string, the high E (thickest bass), into the bridge hole and secure it with one of the bridge pins.
Hold the bridge pin down and pull the string up until you feel it’s firm. Taking this action will lock the ball into the pin as intended.
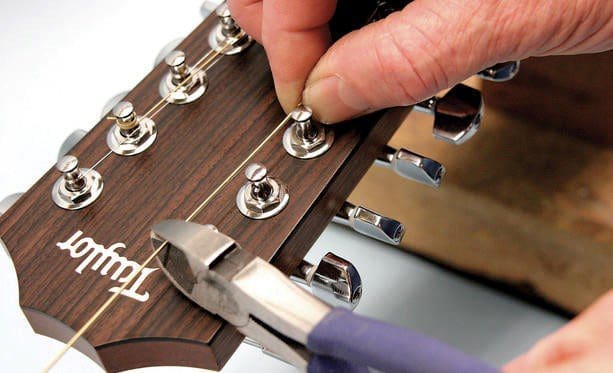
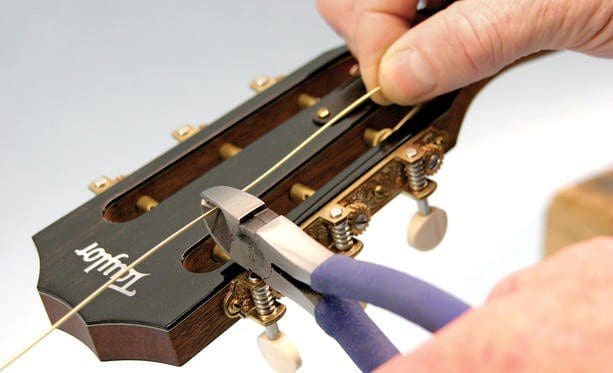
Again, refer to the photo above for reference. Pull the string across the peghead and cut it at the 5th string peg ( 1 post to post length). Make sure the bridge pin does not pop up. If it does, push it back down. See photo.
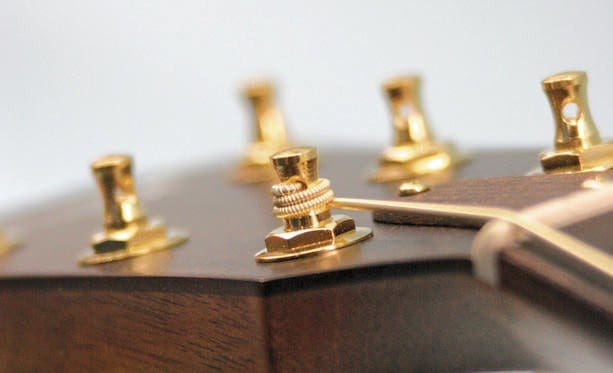
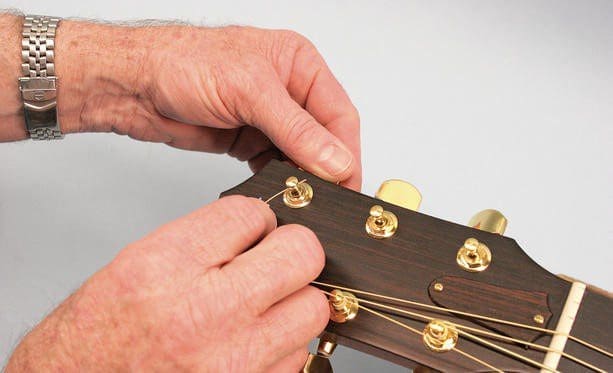
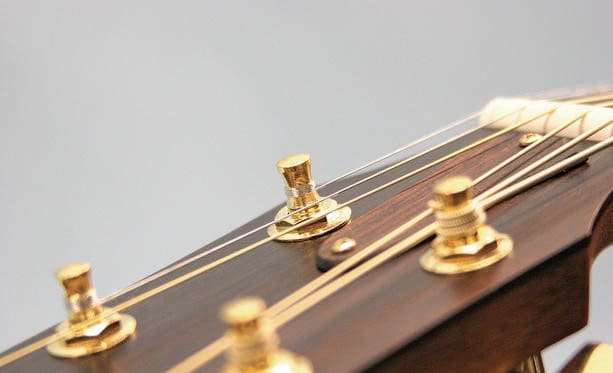
Now, Insert the end of the string into the peg hole. The end of the string should exit about 1/8th from the hole of the tuner. (refer to the photo above)
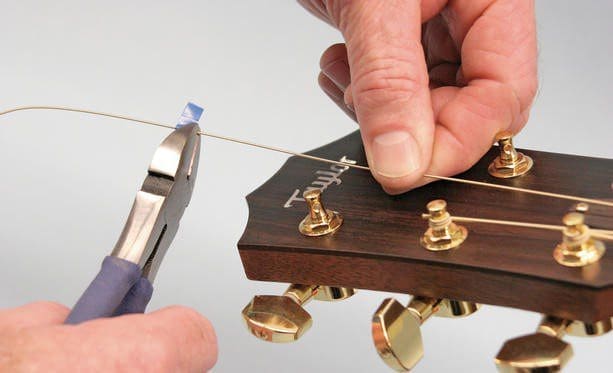
Now trim the 4th D string the equivalent of one post to post length. See photo.
Next, trim all the remaining strings, the G, B, and high E (treble) 1 1/2 tuner post lengths past the post that it will be fitted to. Also, note that the treble string tuners need to be tightened counter-clockwise.
Furthermore, the treble strings need about six wraps, ideally. See the photo above.
At this point, ensure the string wraps wind down below the tuner peg hole. In doing so, you will avoid a kink in the string and avoid breaking it.
5. Stretch the strings
This is an important step. Make you stretch all strings by running your finger from end to end 6 to 8 times per string while maintaining some tension. As a result, this will help keep the guitar in tune during its break-in period.
12-string guitars
Now, for 12-string acoustics, the re-stringing process is the same for the six-string guitar except for the following. You must cut the bass strings E, A, and D, two full tuner post-to-post lengths, from where they passed the post, as shown in the photo above.
Also, in a similar way as for the last step. You need to cut the treble strings G, B, and E, two full tuner post lengths from the post they will be installed.
Slot Head guitars
Suppose you have a slot-head guitar like a classical guitar. You will find it has nylon strings rather than steel.
In a similar fashion to steel strings. Trim the strings for a slot head guitar 1 1/12 post-to-post lengths.
6. Tune all the strings to the correct pitch.
Now, it’s time to tune your guitar to pitch, and the string replacement part of the job is done.
Clean your guitar
Keeping your guitar clean is essential for maintaining its sound quality and appearance.
Here’s how

A soft, damp cloth
Wipe down the body with a soft, damp cloth. A microfiber cloth is ideal, as it won’t scratch the finish.
Guitar polish
Use a guitar polish occasionally to remove any stubborn marks or scratches. Be sure to follow the instructions on the polish carefully.
String cleaner
Clean the strings with a string cleaner. This will help to remove dirt, grime, and sweat that can build up on the strings.

Additional tips
Don’t use harsh chemicals or abrasive cleaners on your guitar. These can damage the finish.
Store your guitar in a cool, dry place. This will help to protect it from moisture and temperature fluctuations.
Humidity can be a very big problem, especially with acoustic guitars. Monitor your acoustic guitar’s environment humidity.
Read more about humidity and acoustic guitars.
Following these tips can help keep your guitar clean and look great for years.
Resources
1. Changing Steel Strings. Taylor Guitars. https://www.taylorguitars.com/support/strings/changing-steel-strings. Published in 2020. Accessed May 1, 2020.


What is the difference the fg800 and the fg800J
According to Yamaha, “the FG800J is made in our factory based in Indonesia, the FG800J NT is manufactured to the same exacting standards as the FG800 but features some slight changes to string spacing and scale length to optimize playability.”